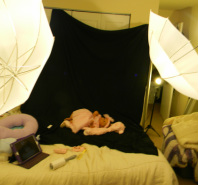
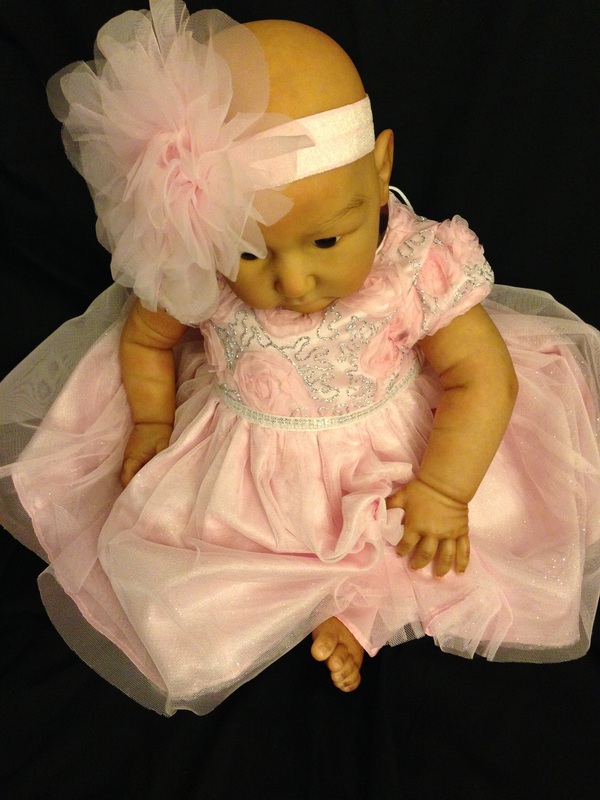
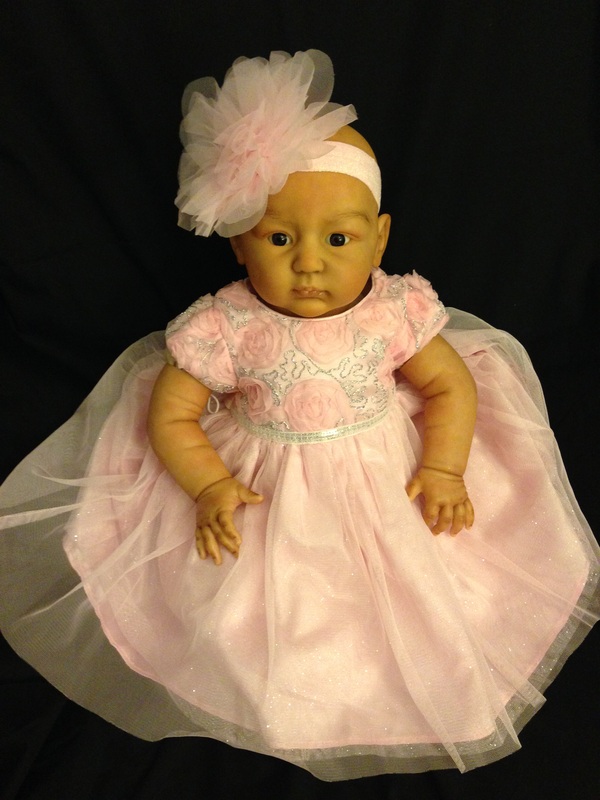
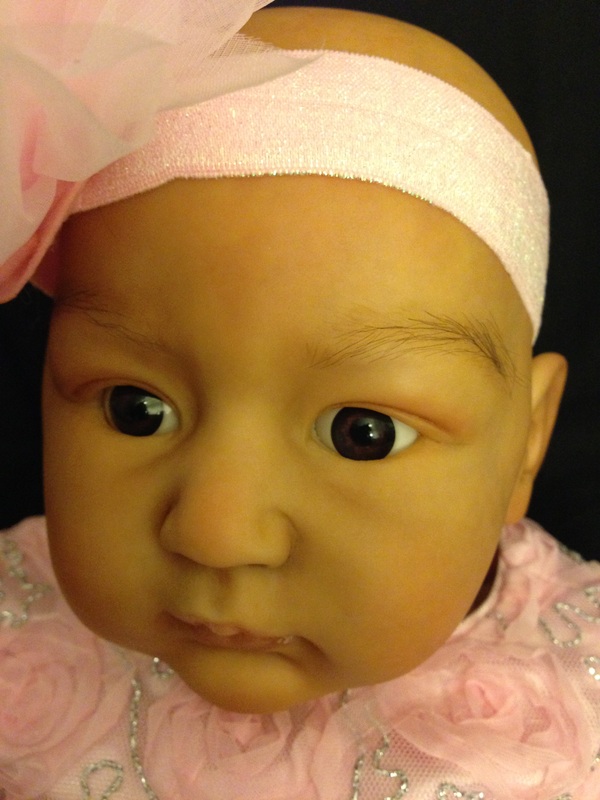
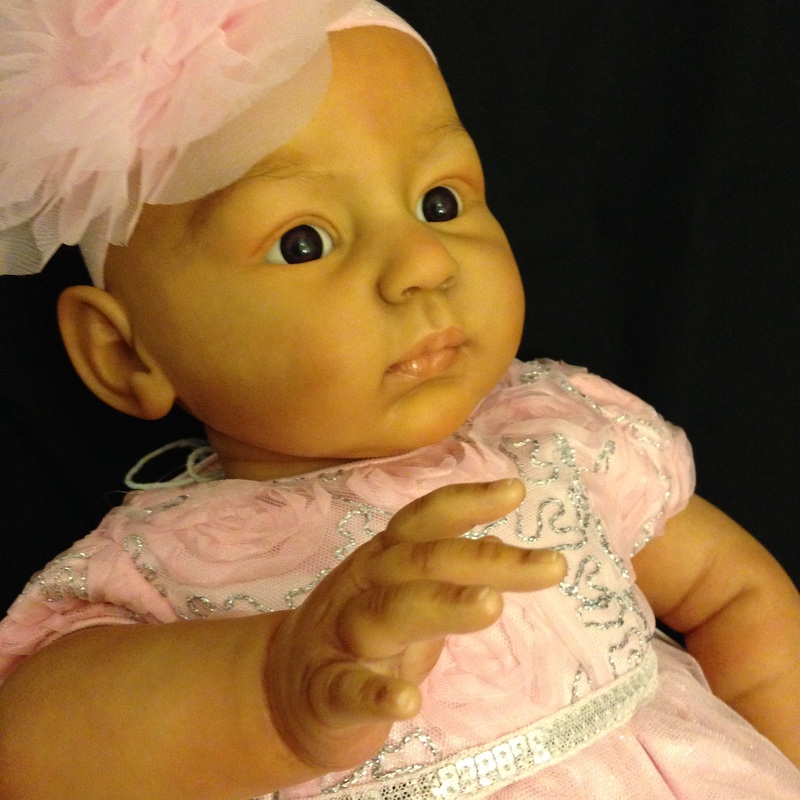
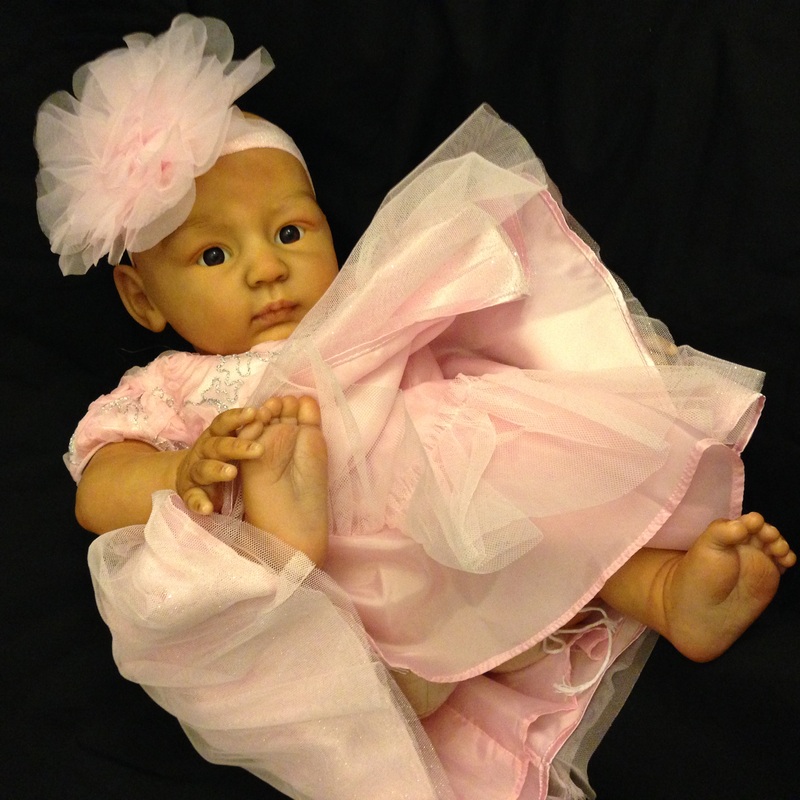
 The backdrop is set, the lights are on, my camera is calibrated and the baby is ready. It's picture day for Fahtima! With a basic three-point lighting system, we'll capture every little detail of this adorable little lady. 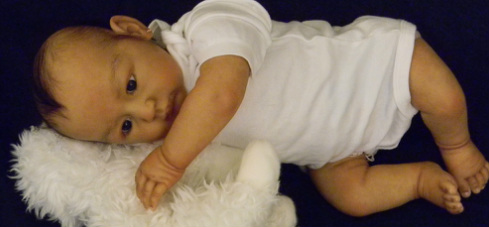
0 Comments
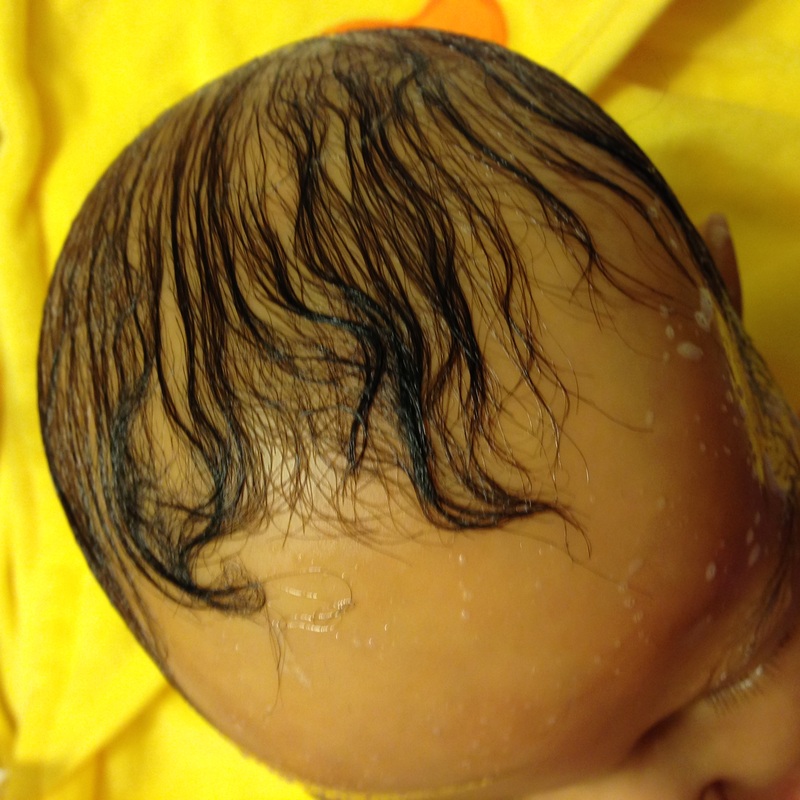
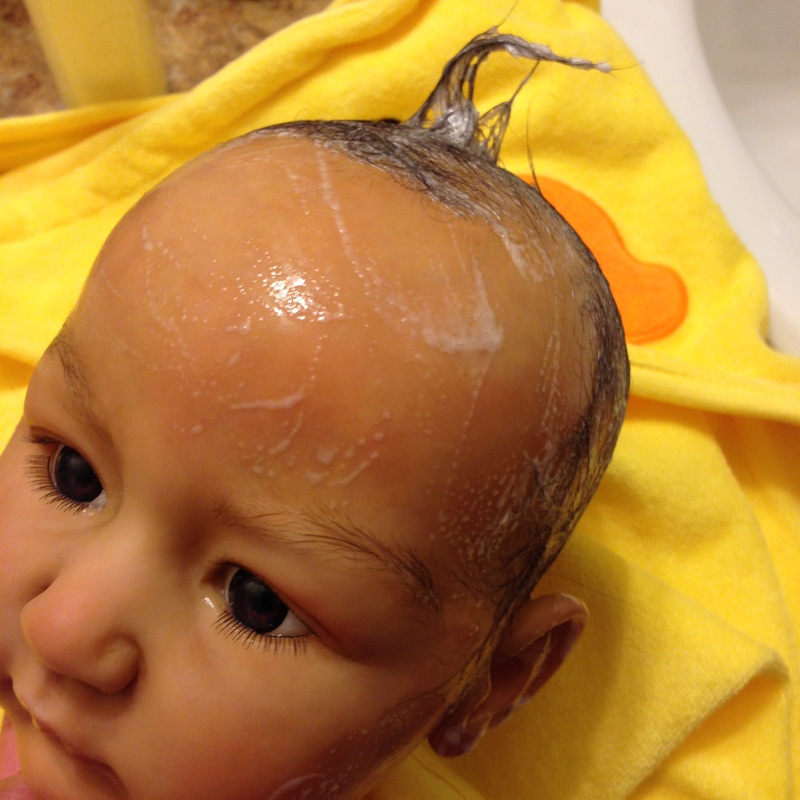
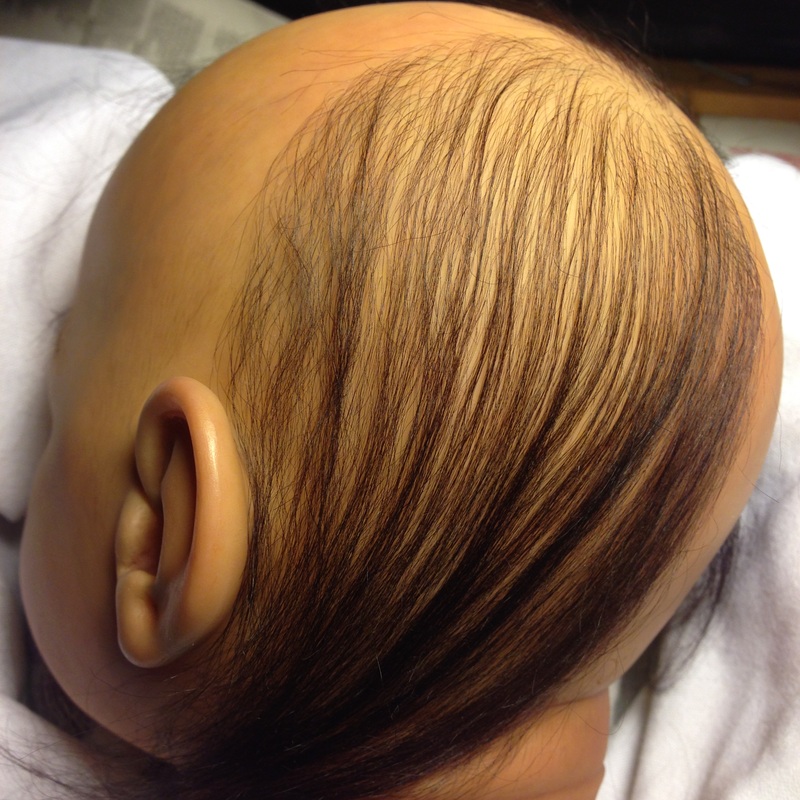
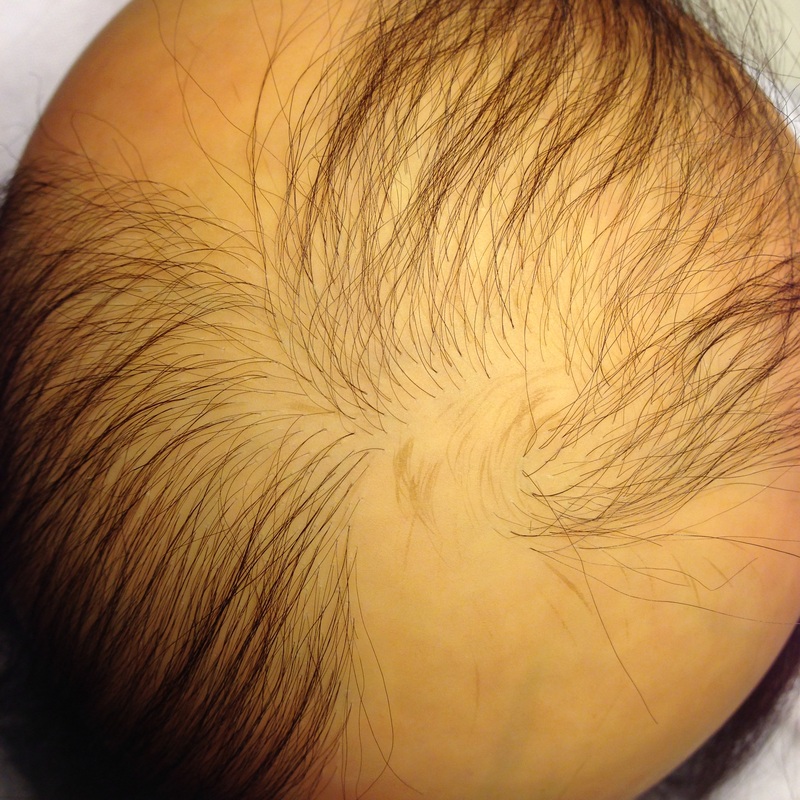
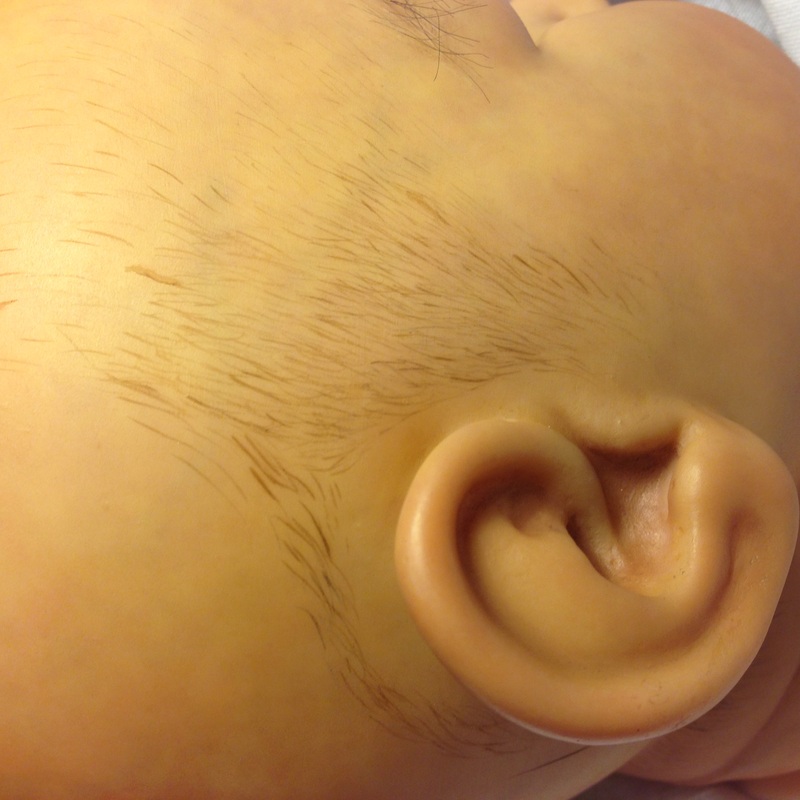
 I really enjoy these final details of reborning. Once I was satisifed with all of Fahtima's painted and rooted hair, it was time to add her finishing touches: wispy eyelashes, moist eyes, wet lips and a snotty nose. Because when you're a baby, a snotty nose is cute. :) Glazes and gloss varnishes create the appearance of moisture in all the right places. Once all the glues and goos were thoroughly dry, it was time for baby's first shampoo. A nice lather and a leave in conditioner leaves baby's hair soft and smelling like a real baby. After many hours of rooting every little hair one at a time, we finally finished Fahtima's micro-rooting. This level of rooting is available on all of our Premium Dolls. Because we carefully placed each hair in the direction of the hair growth pattern that we painted, Fahtima's hair looks gorgeous wet or dry. Time to get this little lady ready to go home! Filling in the baby fine hairs on Fahtima's sides. Rooting over my painted baby hairs gives her a gorgeous 3D lifelike look.
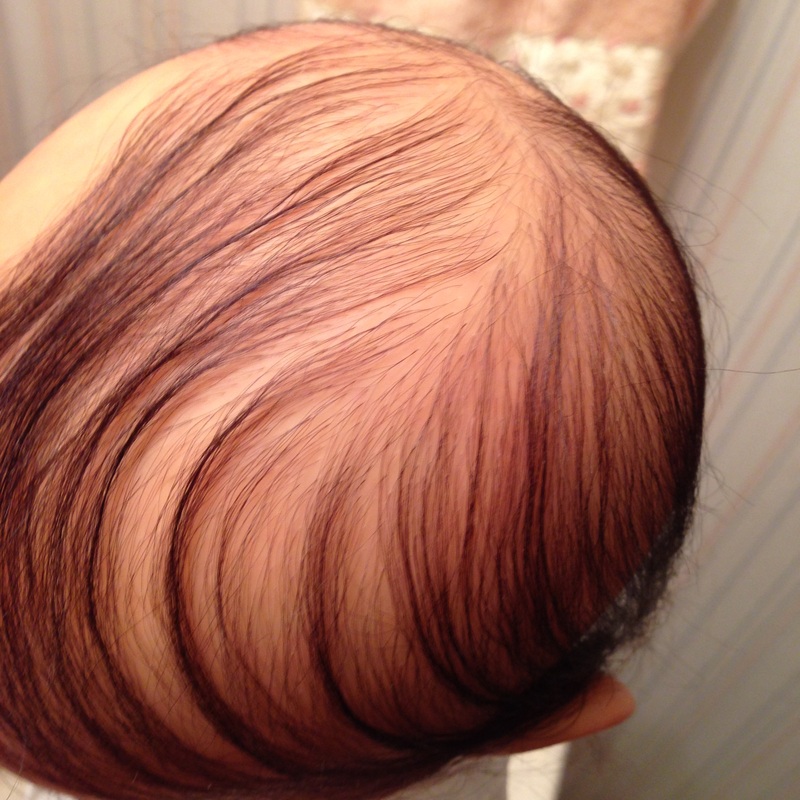
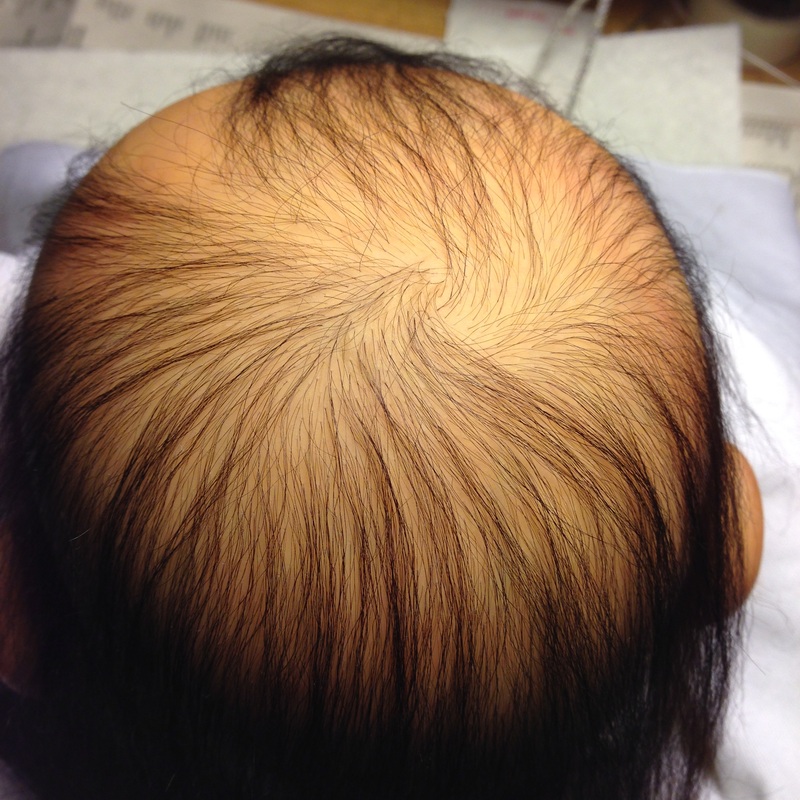
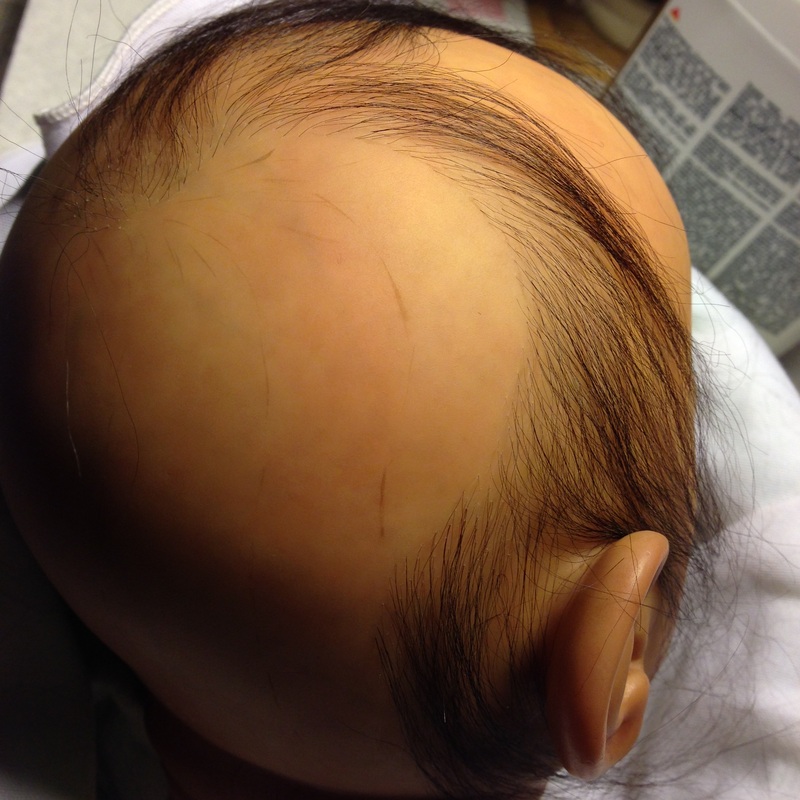
All finished with the back of Fahtima's head. Very pleased with how the crown swirl came out. Now we only have the sides to go!
Almost done with the back of the head! I like to take my time on the crown :) 
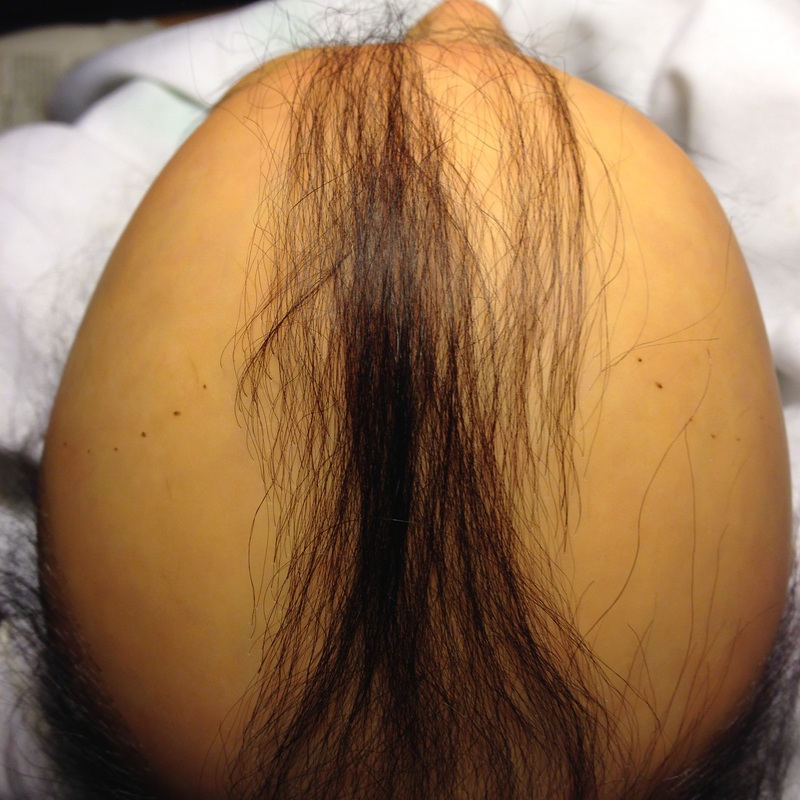
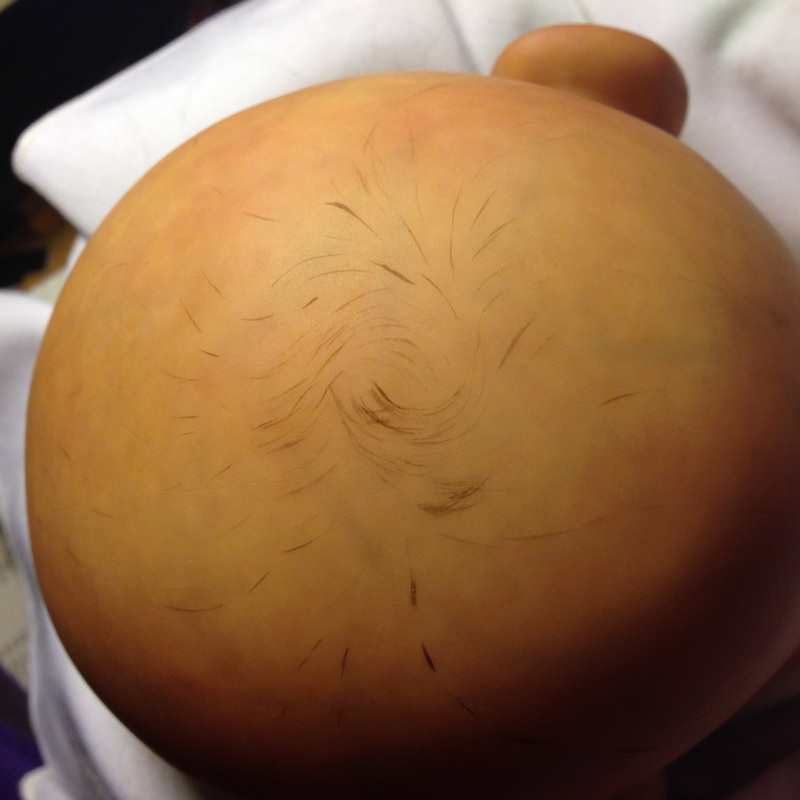
Rooting my way around the back of the head. I love her soft brown hair! This mohair is so silky!
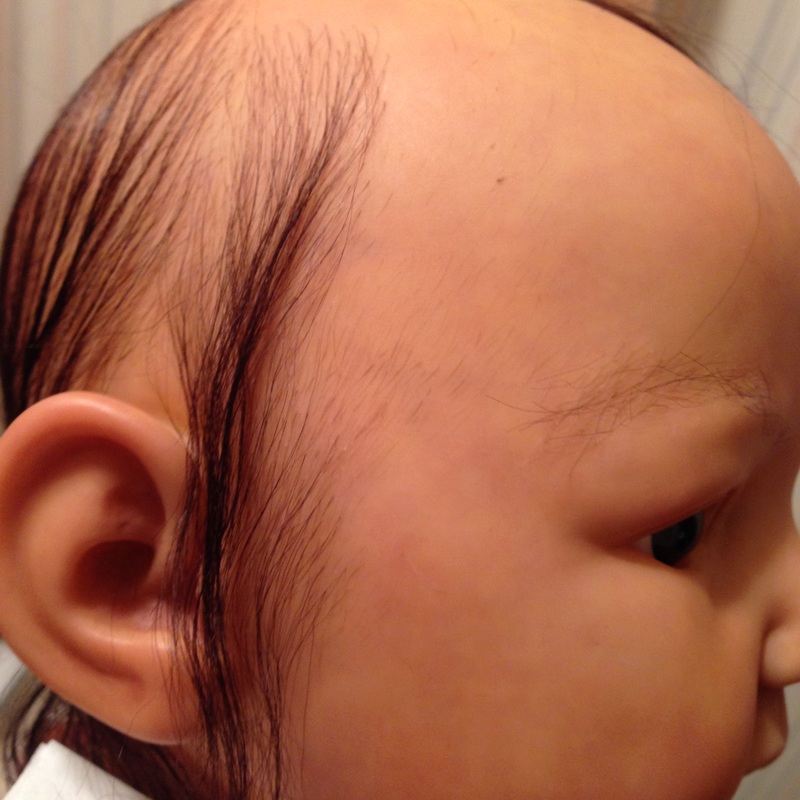
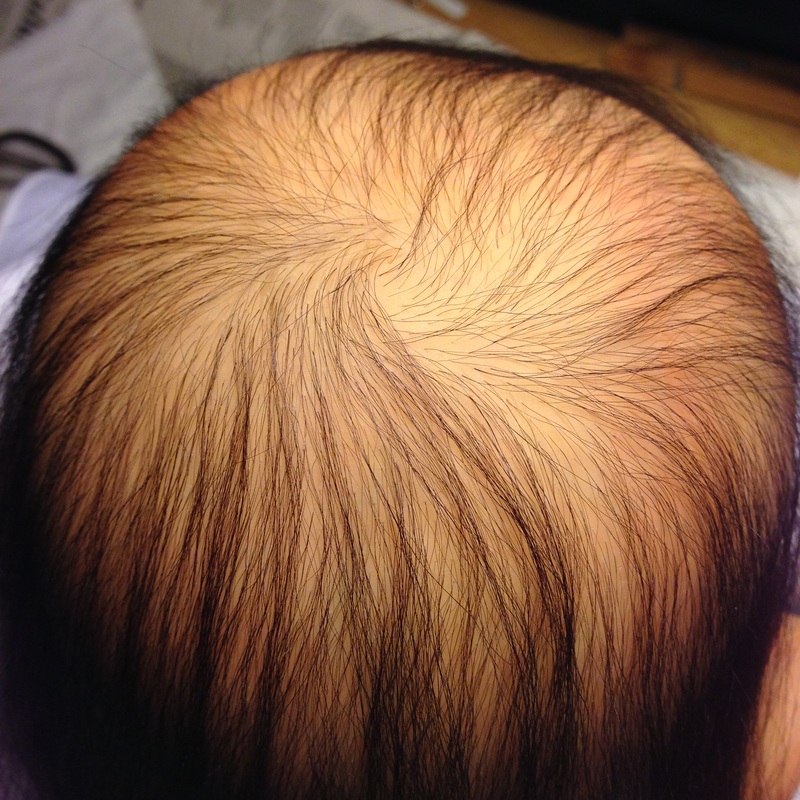
 Every good process has guidelines. Before rooting a single hair, I paint my guidelines. Guidelines map out the natural growth pattern of a baby's hair from crown to hairline. For my portrait babies, this pattern is taken directly from the picture of the real baby. Fahtima has a very unique crown swirl that I'm excited to replicate on her doll. In addition to guidelines, I also paint each super-fine hair of the hairline. This will look really pretty when the rooting is done.
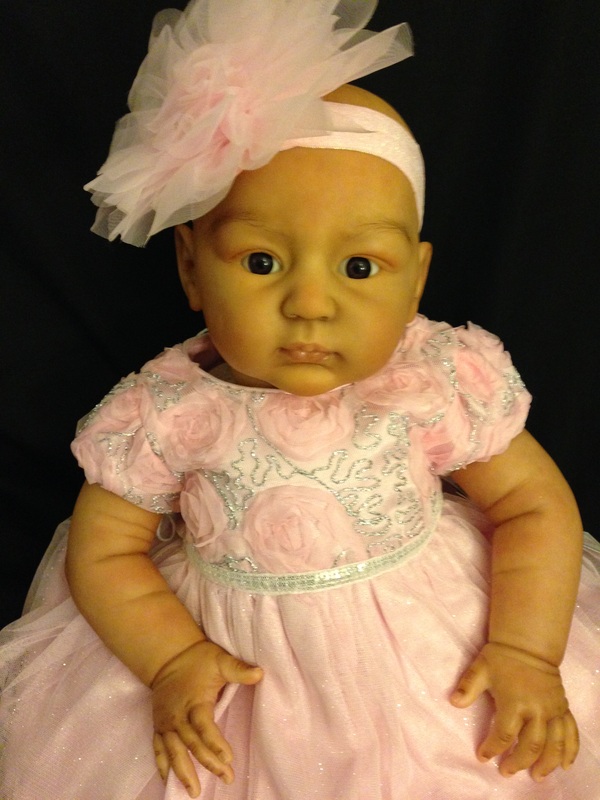
 In all my years of creating lifelike baby dolls, I'm always surprised when the painting is done. After hours and hours and days and weeks of delicately painting tiny details layer after layer after layer, a baby suddenly appears in my workshop! Its an amazing experience. Well, Baby Fahtima magically appeared in my workshop today. Then I knew it was time for her Interim Review. The Interim Review at CustomDollBaby.com is the climax of the painting step. Once the painting is done, the baby is assembled and photographed from different angles to give me the opportunity to thoroughly inspect my work and make any changes necessary before we begin rooting. Typically I save the "Best Match Outfit" for when the baby is complete. But once Fahtima saw her best match dress, she refused to wear anything else. LOL I couldn't argue. She looks like a princess! 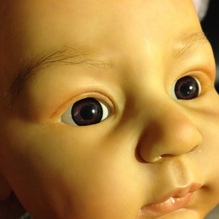 CustomDollBaby.com is able to create lifelike portrait baby dolls that look like a photo of your child for three reasons:
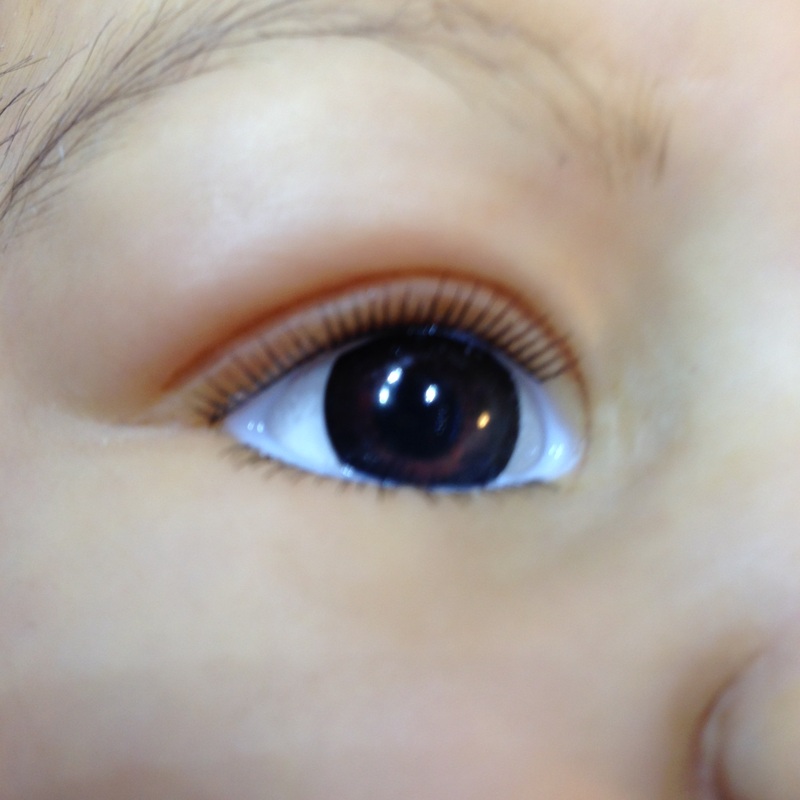
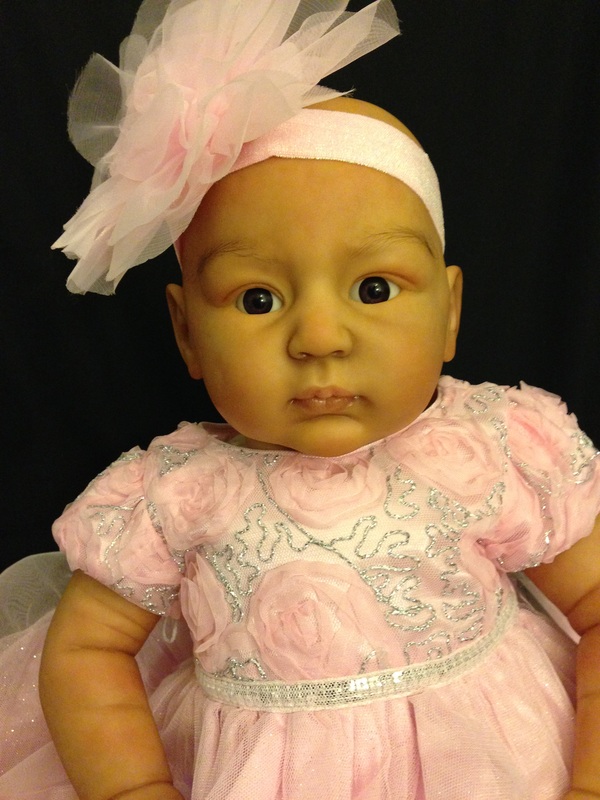
I have to admit that the most challenging feature on Fahtima's doll was the eyebrows. Though Rosalie by Linde Scherer was an excellent match for Fahtima's eye, lip and face shape, Rosalie has a very defined brow bone that calls for straight eyebrows. But Fahtima's eyebrows form a perfect arc. I knew it was going to be an issue and I was up for the challenge! I stared by painting Fahtima's eyebrows. I painted the main shape with fine dark brown strokes that I further filled in with light brown and shading. Rosalie's brow line was still casting too big a shadow, so I added lighter flesh tones to that shadow area to minimize it. Finally, I rooted Fahtima's arc shaped eyebrows over the patten I had painted. The combination of painting and rooting helped give us the eyebrows we wanted in spite of the sculpt. :) 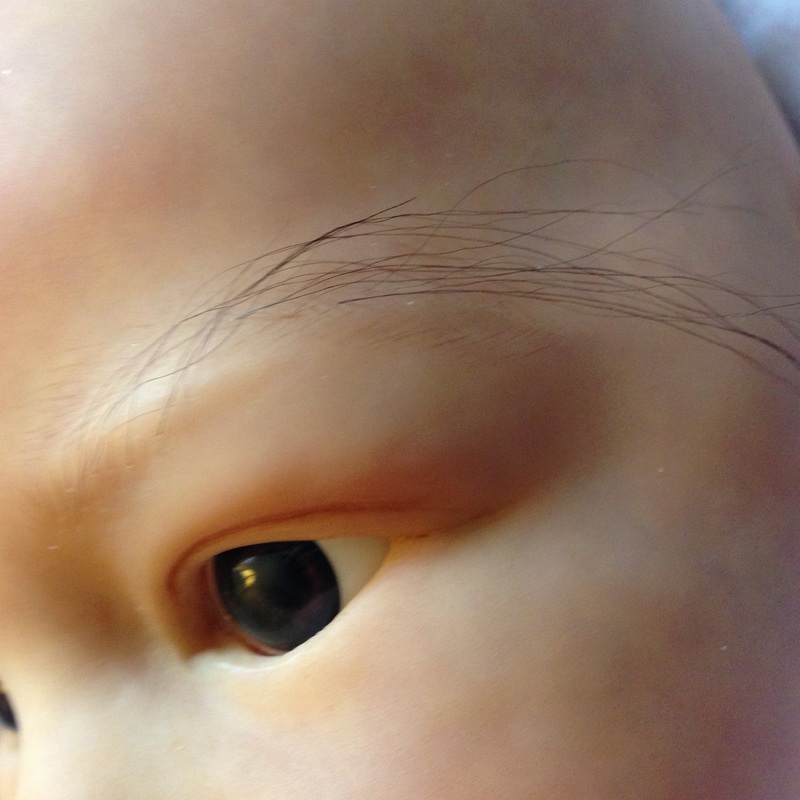
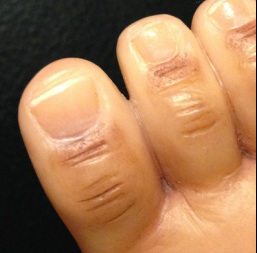 Love to painting little baby manicures! To give a super-realistic look to each of Fahtima's nails, we built out the colors in layers. We started with a pale purple on the bottom half of the nail. Then we went over that with a translucent red. The we topped it off with perfect little white nail tips and half moons. And of course finishes the look with several coats of gloss for smooth and shiny nails. 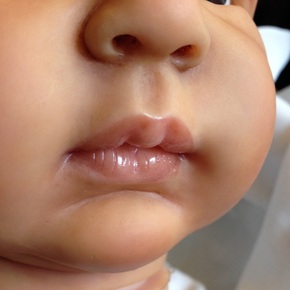 Throughout the detailing process, I've been building out Fahtima's lip color in layers. We started outlining the lips during the shading to give depth to the lips and mouth. During the creases step, we used several layers of that color to highlight Fahtima's natural lip liner look. The final color layers were a translucent pink that we used to paint the ful lip area. When we finalize the look with a few coats of gloss for that perfect moist look. 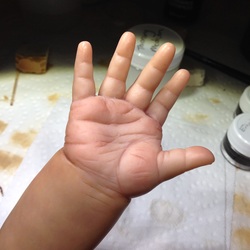 One of my favorite painting steps is the blushing. Blushing gives the baby the rosy cheeks, adorable hands and kissable toes needed to look like she's alive. I like to paint my blushing as if it were a topographical map. My first layer of blush is faint and wide. Each subsequent layer is a little more pigmented and covers a smaller area. This makes the blushing look just right. I also like to mix my own blushing color out of Genesis Red, Pyrole Red, Burnt Sienna and several other paints. When my palette looks like its covered in blood, I know I've reached the optimal blushing color. LOL 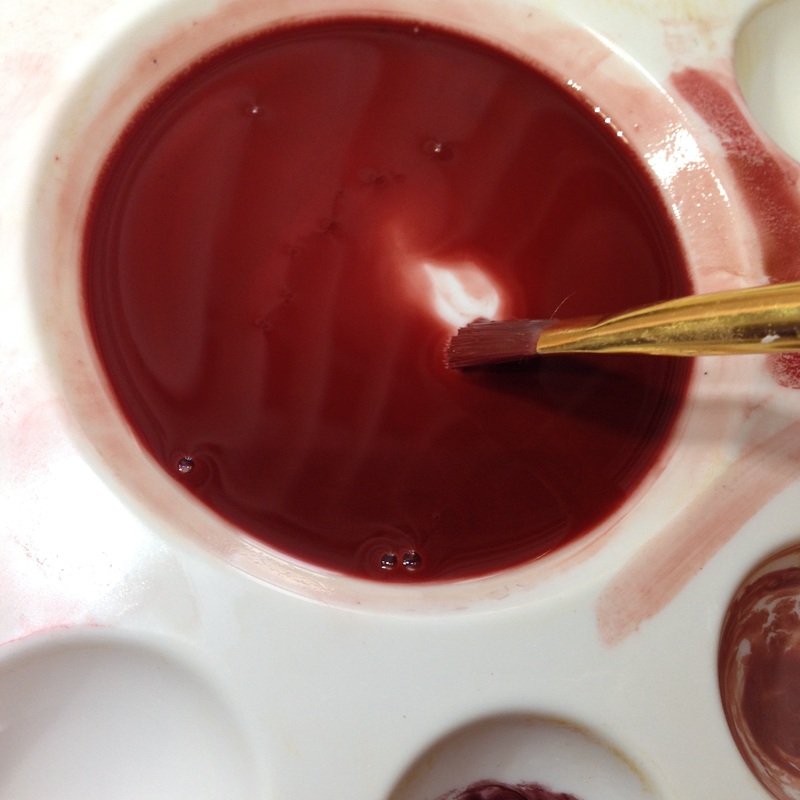  The last few days have been dedicated to tiny detail work - painting the creases.
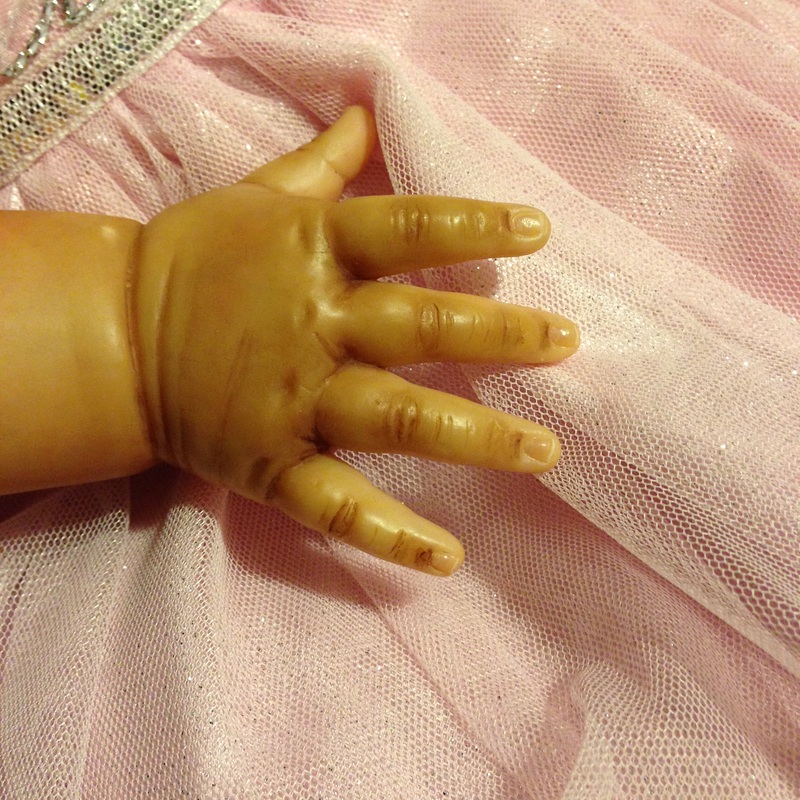
In order to create lifelike wrinkles and folds of skin, we have to hunt down and paint every little crease on the doll. I even painted creases that I felt were missing from the sculpt. :) Like shading, creasing further gives the illusion of depth to the skin. We use two different creases colors. The first is a deep brownish-fleshy-peach for the little creases in the palms of the hands and soles of the feet. The second color is a dark, purplely-brown for pretty much everywhere else. Creasing helps us separate fingers and toes that were cast together in the vinyl. The creasing colors also add plumpness and dimension to the lips. You can really see the difference it makes in the photo above. The hand on the left looks more plush and realistic than the hand on the right that is lacking the creases. I'll build up a few more layers of creasing until we achieve the desired look. Then we'll be back to "painting in broad strokes." LOL 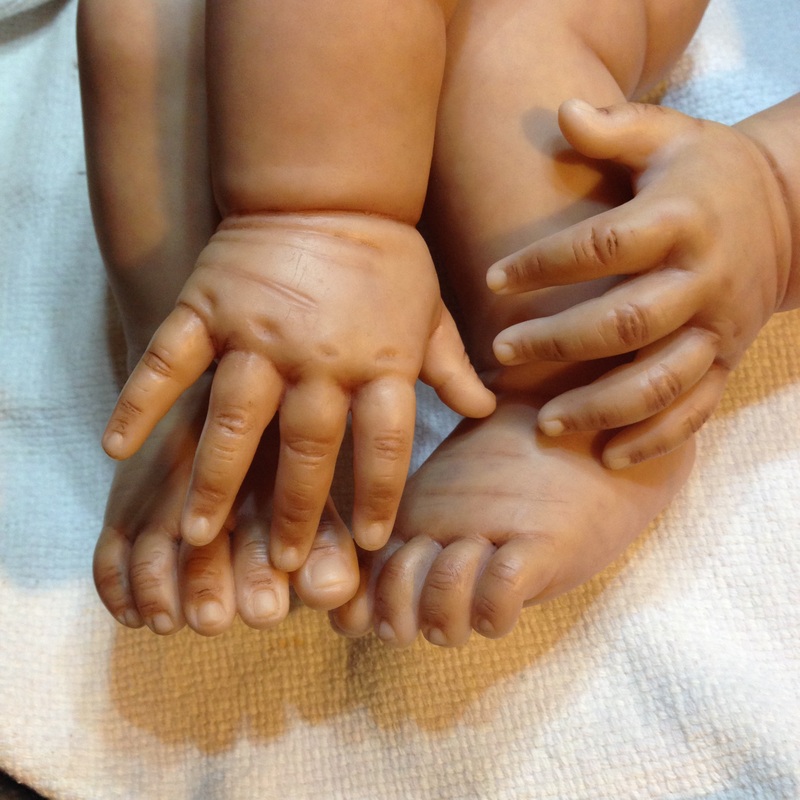 Fahtima has gotten a lot accomplished since my last post. We've done several layers of her custom blend flesh tone to bring out her rich, golden brown complexion. While working the complexion layers, I also began shading. Shading brings a richness and depth to the baby's complexion by deepening skin folds and creases. Shading also brings out the lifelike coloring of the nail beds and knuckles. That's actually one of my favorite features on a hand-painted doll that you never see on factory painted dolls. Her little hands and feet are looking so cute! 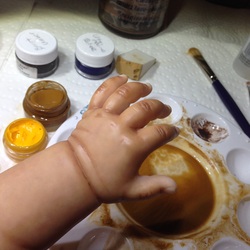 To finalize her skin tone, I gave her a "Gold Wash." LOL I created a diluted custom blend of Raw Sienna and just a tiny bit of Yellow to really bring out her golden undertones.
After a little more shading on the nail beds, we'll be ready to start adding our blushing layers. |
Reborn Doll Babies
All
Reborn Doll ArtistHi! My name is Kim. I am a reborn artist based in NC. I have been creating dolls since I was a child. I discovered the art of life-like baby dolls in 2011 and have been reborning ever since. Archives
December 2016
|


 RSS Feed
Home | Custom Dolls | Portrait Dolls | Pricing and Payment | Contact Us
Promotions | Reborn Baby Doll Care | Vote for Us
Promotions | Reborn Baby Doll Care | Vote for Us
Reborn Dolls distributed by CustomDollBaby.com are high-end collectibles not intended for children under age 12
© 2017 Custom Doll Baby, Inc.
© 2017 Custom Doll Baby, Inc.